iLive Bluetooth Speaker Instructions: A Comprehensive Guide (Updated 05/04/2026)
Today’s date is 05/04/2026 04:20:26 ()․ The iLive Jam Time offers karaoke, lights, and portability, while other models boast water resistance, FM radio, and SD card playback․
iLive Bluetooth speakers have rapidly gained popularity as affordable and feature-rich audio solutions for a diverse range of users․ From compact portable models to larger party speakers, iLive consistently delivers products designed to enhance your listening experience․ These speakers cater to both indoor and outdoor use, offering versatility for any occasion․
A key strength of iLive speakers lies in their blend of functionality and user-friendliness․ Many models incorporate Bluetooth connectivity for seamless pairing with smartphones, tablets, and other devices․ Beyond Bluetooth, iLive often includes auxiliary inputs, SD card readers, and even FM radio capabilities, providing multiple playback options․ The iLive Jam Time specifically stands out with its karaoke features and integrated party lights, while other models prioritize durability and weather resistance for outdoor adventures․
This comprehensive guide aims to provide detailed instructions for setting up, operating, and troubleshooting your iLive Bluetooth speaker, ensuring you get the most out of your device․
Understanding iLive Speaker Models
iLive offers a diverse portfolio of Bluetooth speakers, each tailored to specific needs and preferences․ The iLive Jam Time Portable Bluetooth Party Speaker is designed for on-the-go entertainment, emphasizing karaoke functionality and vibrant party lights․ It’s lightweight and easy to transport, making it ideal for gatherings․
For those seeking ruggedness and all-weather performance, the iLive Water Resistant Indoor/Outdoor Speaker provides a robust solution․ This model excels in environments where splashes or moisture are a concern, and notably includes FM radio and SD card playback options․ Unique to this model is the ability to stake it into the ground for secure placement․
Finally, the iLive Tower Speaker typically represents a larger, more powerful option, often featuring enhanced audio quality and potentially additional connectivity options․ Understanding these core differences will help you navigate the specific instructions relevant to your iLive speaker․
Key Features Across iLive Bluetooth Speakers
Despite model variations, several key features consistently appear across the iLive Bluetooth speaker range․ Bluetooth connectivity is fundamental, enabling wireless streaming from smartphones, tablets, and laptops․ Many iLive speakers also incorporate auxiliary input for compatibility with devices lacking Bluetooth capabilities․
A surprising number of models, like the water-resistant version, include a built-in FM radio, offering access to traditional broadcasts․ SD card/USB functionality is another common inclusion, allowing direct playback of digital music files․ The iLive Jam Time distinguishes itself with dedicated karaoke features and integrated party lights, enhancing the entertainment experience․
Furthermore, iLive speakers generally prioritize portability and ease of use, making them accessible to a wide range of users․ Sound quality, while varying by model, consistently aims to exceed expectations given the price point․
Setting Up Your iLive Bluetooth Speaker
Begin by charging your new iLive speaker, then pair it wirelessly via Bluetooth, or utilize the auxiliary input or SD card/USB options․
Initial Charging and Powering On
Before your first use, it’s crucial to fully charge your iLive Bluetooth speaker to ensure optimal performance and battery longevity․ Locate the charging port – typically a Micro-USB or USB-C port – on the speaker․
Connect the provided charging cable to the speaker and a suitable power source, such as a USB wall adapter or a computer’s USB port․ A charging indicator light will illuminate, often red, to signify that charging is in progress․
Allow several hours for a complete charge; the indicator light will usually change to green (or turn off) when fully charged․ Once charged, press and hold the power button – usually located on the top or side of the speaker – to power it on․ You may hear a startup chime or see an indicator light confirm activation․
Bluetooth Pairing with Devices
To connect your iLive speaker via Bluetooth, first ensure the speaker is powered on․ Activate Bluetooth mode – often by pressing a dedicated Bluetooth button or through the mode selection function․ The speaker will typically enter pairing mode, indicated by a flashing blue light or an audible tone․
On your smartphone, tablet, or computer, navigate to the Bluetooth settings menu․ Enable Bluetooth and scan for available devices․ Your iLive speaker should appear in the list of detected devices, usually identified by its model name․
Select your iLive speaker from the list to initiate the pairing process․ You may be prompted to enter a passcode; if so, try “0000” or check the speaker’s documentation․ Once paired, the speaker will usually emit a confirmation sound and the Bluetooth indicator light will become solid․
Connecting via Auxiliary Input
For a wired connection, utilize the auxiliary (AUX) input on your iLive speaker․ Locate the 3․5mm AUX input port – typically on the rear or side of the speaker․ Connect one end of a standard 3․5mm audio cable into the speaker’s AUX input․
Plug the other end of the audio cable into the headphone jack or line-out port of your audio source device (smartphone, MP3 player, computer, etc․)․ Once connected, power on your audio source and select the appropriate AUX input on your iLive speaker using the mode selection button․
Adjust the volume on both your iLive speaker and the connected audio source to achieve your desired listening level․ The AUX connection bypasses Bluetooth, offering a stable and reliable audio experience․
Using the SD Card/USB Functionality
Many iLive Bluetooth speakers offer SD card and USB playback for convenient music access․ Locate the SD card slot and/or USB port on your speaker – usually found on the rear or side panel․ Ensure your SD card is formatted correctly (typically FAT32) and contains supported audio files (MP3, WAV, etc․)․
Insert the SD card or USB drive into the corresponding port․ Power on your iLive speaker and use the mode selection button to switch to SD card or USB mode․ The speaker will automatically detect and begin playing the audio files․
Use the playback controls on the speaker to navigate through tracks, adjust volume, and control playback․ This feature provides an alternative to Bluetooth streaming, ideal for pre-loaded playlists․
Controlling Your iLive Speaker
iLive speakers feature intuitive controls for power, volume, playback, and mode selection, alongside microphone inputs for karaoke enjoyment and customized audio experiences․
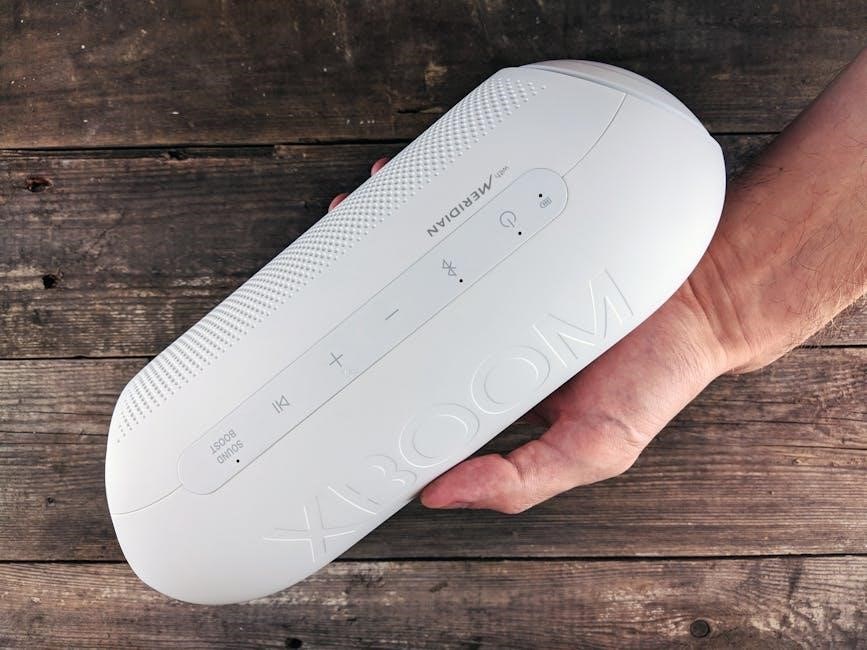
Power Button and Volume Control
The power button on your iLive speaker is typically located on the rear or side panel, clearly marked for easy identification․ A simple press will toggle the speaker on and off, initiating or terminating its operational state․ Volume control is usually managed through dedicated “+” and “-” buttons, allowing for precise adjustments to the audio output level․
Some models may incorporate a rotary dial for volume adjustment, offering a more analog control experience․ Pay attention to the indicator lights accompanying the volume buttons; these often provide visual feedback on the current volume level․ Experiment with incremental adjustments to find your preferred listening volume, ensuring a comfortable and immersive audio experience without distortion․ Remember to lower the volume before switching modes or connecting new devices․
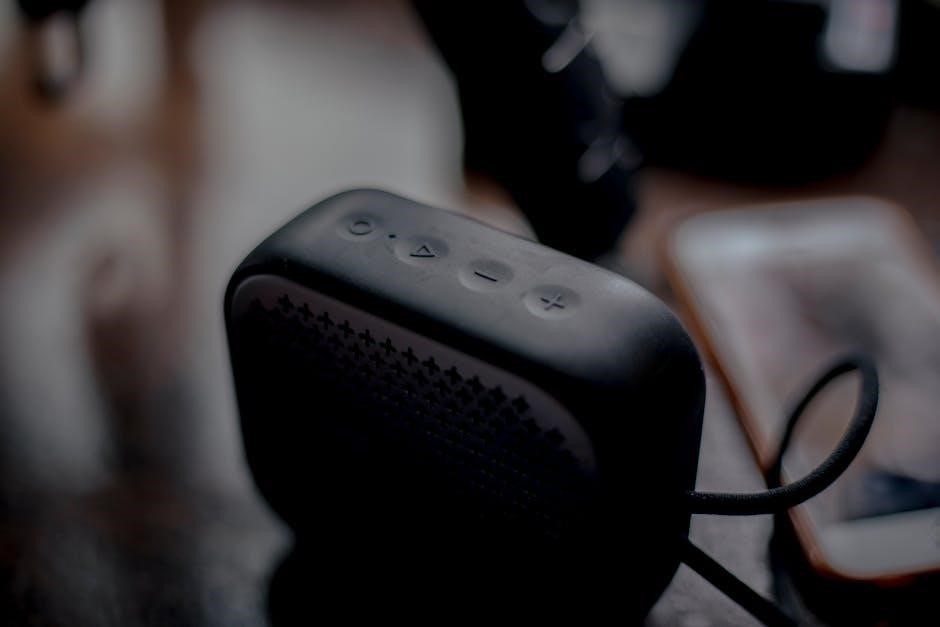
Playback Controls (Play/Pause, Skip)
iLive Bluetooth speakers generally feature intuitive playback controls, conveniently located for easy access during music enjoyment․ The ‘Play/Pause’ button, often symbolized by a triangle or vertical bars, initiates or halts audio playback from the connected device or media source․ ‘Skip’ buttons, typically marked with forward and backward arrows, allow you to navigate through tracks within a playlist or on an SD card․
Pressing and holding the skip buttons on some models may adjust the overall volume, offering an alternative control method․ Familiarize yourself with the specific button layout of your iLive speaker model, as variations may exist․ These controls provide seamless management of your audio experience, ensuring effortless navigation and enjoyment of your favorite music․
Mode Selection (Bluetooth, FM Radio, SD Card)
iLive Bluetooth speakers offer versatile connectivity options, selectable through a dedicated ‘Mode’ button․ Pressing this button cycles through available sources: Bluetooth for wireless streaming from smartphones and tablets, FM Radio for enjoying broadcast stations, and SD Card for playback of pre-loaded MP3 files․
The selected mode is often indicated by a visual cue, such as an illuminated LED or a display screen message․ When in Bluetooth mode, ensure your device is paired; for FM Radio, initiate a station scan; and for SD Card, verify a compatible card is inserted․ These diverse modes cater to various listening preferences, providing flexibility and convenience for any situation․ Enjoy the freedom of choice with your iLive speaker!
Microphone Input and Karaoke Features
Many iLive Bluetooth speakers, particularly the Jam Time model, feature a dedicated microphone input, unlocking a fun karaoke experience․ Locate the microphone port (typically a 6․35mm jack) and connect a compatible microphone․ The speaker often includes echo control to enhance vocal effects, adding a professional touch to your performances․
Adjust microphone volume separately from the main speaker volume for optimal balance․ Some models allow you to prioritize microphone input, effectively muting the original track for a true karaoke feel․ Combined with the vibrant party lights found on certain iLive speakers, the karaoke feature transforms any gathering into an interactive and entertaining event․ Get ready to sing your heart out!
iLive Speaker Specific Models & Instructions
Detailed guidance is available for the Jam Time, water-resistant indoor/outdoor speakers, and Tower models, covering unique features like staking and enhanced sound profiles․
iLive Jam Time Portable Bluetooth Party Speaker Instructions
The iLive Jam Time Portable Bluetooth Party Speaker is designed for on-the-go entertainment, blending functionality with a vibrant party atmosphere․ To begin, ensure the speaker is fully charged using the provided USB cable․ Power on the device using the power button, initiating Bluetooth pairing mode․
Connect to your smartphone or tablet via Bluetooth for wireless audio streaming․ The Jam Time truly shines with its karaoke feature; simply plug in a microphone (not included) and sing along to your favorite tracks! Enhance the party with the integrated party lights, adding a dynamic visual element․
Volume control and playback functions (play/pause, skip) are conveniently located on the speaker itself․ Its lightweight design and portability make it ideal for gatherings, picnics, or simply enjoying music anywhere․ Remember to consult the full manual for detailed instructions and safety precautions․
iLive Water Resistant Indoor/Outdoor Speaker Instructions
The iLive Water Resistant Indoor/Outdoor Speaker offers versatile audio enjoyment, designed to withstand the elements for both indoor and outdoor use․ Begin by charging the speaker fully via USB․ Power it on, and initiate Bluetooth pairing to connect with your preferred devices – smartphones, tablets, or laptops․
Beyond Bluetooth connectivity, this speaker features both FM radio and SD card playback capabilities, expanding your listening options․ A notable feature is the ability to stake the speaker into the ground, providing stability for outdoor events and preventing accidental tipping․
These speakers deliver sound quality exceeding their price point․ Utilize the onboard controls for volume adjustment, track selection, and mode switching (Bluetooth, FM, SD card)․ Remember to check the water resistance rating before exposing the speaker to significant moisture․
iLive Tower Speaker Instructions
The iLive Tower Speaker is designed to deliver powerful sound and a visually striking presence․ Begin by ensuring the speaker is placed on a stable, level surface․ Connect the power adapter and allow for a full initial charge to maximize battery life․ Power on the unit using the designated power button․
Pairing via Bluetooth is straightforward; activate Bluetooth on your device and select the iLive Tower Speaker from the available devices list․ Explore the speaker’s additional input options, such as auxiliary input for wired connections․
Utilize the integrated controls to manage playback – adjust volume, skip tracks, and select your desired audio source․ While specific features may vary by model, expect robust sound and a user-friendly experience․ Regularly check for firmware updates to ensure optimal performance․
Troubleshooting Common Issues
Common problems include speakers failing to power on, Bluetooth pairing difficulties, and distorted or low volume․ Microphone malfunctions also require attention and solutions․
Speaker Won’t Turn On
If your iLive speaker isn’t powering on, begin with the basics: ensure it’s adequately charged․ Connect the provided power adapter to a working outlet and the speaker’s charging port, allowing several hours for a full charge․ Verify the power outlet is functioning correctly by testing it with another device․
Next, double-check the power button․ Press and hold it firmly for a few seconds – sometimes a brief press isn’t sufficient; If still unresponsive, try a different charging cable and adapter to rule out a faulty accessory․ A complete power cycle can sometimes resolve the issue; disconnect the power source, wait a minute, and then reconnect and try powering on again․
In rare cases, a reset might be necessary (consult your specific model’s instructions for reset procedures)․ If none of these steps work, it may indicate a more serious internal problem requiring professional assistance or warranty claim consideration․
Bluetooth Pairing Problems
Experiencing difficulty pairing your iLive speaker via Bluetooth? First, ensure Bluetooth is enabled on your device (smartphone, tablet, etc․)․ Then, put the speaker into pairing mode – typically by pressing and holding the Bluetooth button until an indicator light flashes․ Make sure the speaker isn’t already connected to another device; it can only maintain one active Bluetooth connection at a time․
If your speaker isn’t appearing in your device’s Bluetooth list, try moving closer to the speaker․ Interference from other wireless devices can sometimes hinder pairing․ Also, “forget” or remove the speaker from your device’s Bluetooth settings and then re-scan for devices․ Restarting both your iLive speaker and your Bluetooth device can often resolve connectivity issues․
Finally, confirm your device’s Bluetooth version is compatible with the speaker’s Bluetooth specifications․
Sound Distortion or Low Volume
If you’re experiencing sound distortion or unexpectedly low volume with your iLive speaker, several factors could be at play; First, verify the volume level on both the speaker and your connected device (smartphone, tablet, etc․)․ Ensure neither is muted or set to a very low level․
Distortion can sometimes indicate the audio source is of poor quality or the volume is simply too high, causing the speaker to overload․ Try reducing the volume on both devices and testing with a different audio track․ Check the auxiliary cable (if used) for damage or a loose connection․
For models with bass and treble controls, experiment with adjusting these settings to find a clearer sound profile․ A balanced setting often provides the best results․
Microphone Not Working
If your iLive speaker’s microphone isn’t functioning, begin by confirming it’s properly plugged into the designated microphone input jack․ Ensure the connection is secure and that you’re using the correct type of microphone – typically a 3․5mm jack․
Verify the microphone volume is turned up both on the speaker itself (if it has a dedicated control) and within the settings of any connected device or karaoke application you’re using․ Some iLive models feature echo or microphone level adjustments; check these settings․
Test with a different microphone to rule out a faulty microphone as the source of the problem․ If another microphone works, the original microphone needs replacing․ Finally, ensure the speaker is in the correct mode (Karaoke) for microphone input․
Advanced Features & Customization
Explore FM radio operation, station saving, bass/treble adjustments, and party light controls (if equipped)․ Outdoor models may also offer speaker staking options for stability․
FM Radio Operation and Station Saving
To utilize the FM radio function on your iLive Bluetooth speaker, first ensure the speaker is powered on and set to FM mode using the mode selection button․ Press the ‘Play/Pause’ button to initiate an automatic station scan; the speaker will search for available FM stations․
Once the scan is complete, press the ‘Skip’ or ‘Previous’ buttons to navigate through the discovered stations․ To save your favorite stations, many iLive models feature a station saving function․ Typically, this involves pressing and holding a numbered button (1-5, for example) while tuned to the desired station․
To recall a saved station, simply press the corresponding numbered button․ Refer to your specific model’s instructions for detailed steps, as the process may vary slightly․ Ensure the antenna is extended for optimal reception, especially in areas with weak signal strength․ Experiment with antenna placement to improve clarity․
Adjusting Bass and Treble
Many iLive Bluetooth speakers offer customizable sound profiles through bass and treble adjustment controls․ These controls allow you to fine-tune the audio output to match your personal preferences and the genre of music you are listening to․ Typically, dedicated buttons or a rotating dial are used for these adjustments․
Increasing the bass will enhance the low-frequency sounds, providing a richer, more powerful audio experience, ideal for genres like hip-hop or electronic dance music․ Conversely, increasing the treble will boost the high-frequency sounds, making vocals and instruments clearer, suitable for acoustic or classical music․
Experiment with different settings to find the optimal balance for your listening environment․ Start with moderate adjustments and gradually increase or decrease the bass and treble levels until you achieve the desired sound quality․ Remember that excessive boosting of either frequency can lead to distortion․
Using the Party Lights (If Applicable)
Certain iLive Bluetooth speaker models, like the iLive Jam Time Portable Bluetooth Party Speaker, feature integrated party lights to enhance the ambiance during your listening sessions․ These lights typically cycle through a variety of colors and patterns, creating a dynamic visual experience synchronized with the music․
Activating the party lights is usually straightforward․ A dedicated button on the speaker’s control panel will toggle the lights on or off․ Some models may offer different lighting modes, such as a slow fade, fast strobe, or sound-activated mode, where the lights pulse to the beat of the music․
To customize the lighting effects, consult your speaker’s specific user manual․ Adjusting the brightness or selecting different color schemes might be possible․ Enjoy the vibrant atmosphere created by the party lights and elevate your gatherings!
Speaker Staking (For Outdoor Models)
Specifically designed for outdoor use, certain iLive Bluetooth speakers, such as the Water Resistant Indoor/Outdoor Speaker, include the capability to be staked into the ground for enhanced stability․ This feature is particularly useful when enjoying music during picnics, barbecues, or other outdoor events where a secure speaker placement is desired․
The staking process typically involves locating the designated stake openings on the base of the speaker․ Carefully insert the provided stakes into these openings, ensuring they are firmly secured․ The stakes will anchor the speaker, preventing it from tipping over or moving around on uneven surfaces․
Always exercise caution when staking the speaker, especially on hard or rocky ground․ Avoid applying excessive force, which could damage the speaker or the stakes․ Proper staking ensures a secure and enjoyable listening experience in outdoor settings․
Maintenance and Care
Regular cleaning, optimal charging practices, and proper storage will extend your iLive speaker’s lifespan, ensuring consistent performance and enjoyment for years to come․
Cleaning Your iLive Speaker
Maintaining a clean iLive speaker is crucial for optimal performance and longevity․ Before cleaning, always ensure the speaker is powered off and disconnected from any power source․ Use a soft, dry cloth to gently wipe down the exterior surfaces, removing dust and fingerprints․
For stubborn marks, slightly dampen the cloth with water, but avoid getting any moisture into the speaker’s openings․ Never use harsh chemicals, abrasive cleaners, or solvents, as these can damage the finish or internal components․ Pay particular attention to the control buttons and speaker grille, ensuring they are free from debris․
If your speaker is water-resistant, you can gently rinse it with water, but avoid prolonged submersion․ Allow the speaker to air dry completely before using it again․ Regular cleaning will help keep your iLive speaker looking and sounding its best!
Battery Life and Charging Tips
Maximizing your iLive speaker’s battery life ensures uninterrupted enjoyment․ Battery performance varies depending on volume level, features used (like party lights), and model․ Generally, expect several hours of playtime on a full charge․ To optimize battery life, avoid playing music at maximum volume for extended periods․
When charging, use the provided USB cable and a compatible power adapter․ Avoid using fast chargers not specifically designed for your speaker, as they could potentially damage the battery․ A full charge typically takes a few hours; the speaker may indicate charging status with an LED light․
To prolong battery lifespan, avoid completely draining the battery regularly․ It’s better to charge it when it reaches a lower level․ Store the speaker in a cool, dry place when not in use to preserve battery health․
Storage Recommendations
Proper storage extends the life of your iLive Bluetooth speaker, especially during periods of infrequent use․ Before storing, ensure the speaker is completely powered off and, ideally, partially charged – avoid storing with a fully depleted or fully charged battery for extended durations․
Store the speaker in a cool, dry environment, away from direct sunlight, extreme temperatures, and humidity․ A temperature-controlled indoor space is best․ Avoid storing in areas prone to dust accumulation, which can damage internal components․
If possible, store the speaker in its original packaging to provide additional protection against physical damage․ Keep the charging cable and any accessories together for convenience․ Regularly check the stored speaker to ensure no signs of deterioration are present․
Safety Precautions
To ensure safe operation of your iLive Bluetooth speaker, always adhere to these guidelines․ Avoid exposing the speaker to excessive moisture or liquids; while some models are water-resistant, they are not waterproof․
Do not disassemble or attempt to repair the speaker yourself; this will void the warranty and could pose a safety hazard․ Keep the speaker away from heat sources, such as radiators or direct sunlight, as this can damage the battery and internal components․
Use only the provided charging cable or a certified replacement to avoid damaging the speaker or creating a fire risk․ Never leave the speaker unattended while charging․ Ensure adequate ventilation around the speaker during operation and charging to prevent overheating․